模版说明
模版说明
Flutter GetX Template
Flutter Getx模板使用所有所需的配置启动新项目从未如此简单。
Introduction
解决项目通用功能。
- 主题
- 多语言切换
- Firebase
- 通知
- 网络
- 业务MVVM架构
- 隔离API
- Snackbar,Toasts
- 更改 app Icon, Name and package id
该本项目将处理所有这些可重复的事情,因此可以通过几个步骤启动项目。
Upcoming Updates
- 最新flutter版本
- 升级GetX 5
- 添加 overlay loading 功能
- 将 android 目标升级到 35 以支持最新的 android 版本
- 升级gradle版本到最新
Latest Updates 🚀
- 更新到最新的 flutter 版本(3.21.1)
- 更新主题类
- 更新安全 api 调用类
- 重构代码
- 更新示例
What is new 🌟
- 将本地通知助手与 fcm 助手分开
- BaseClient 的集成测试
- Awesome Notifications Helper 的集成测试
- Widget Animator 的集成测试
- 也适用于 BaseClient 的单元测试
- MySharedPreference 的单元测试
- MyHive 的单元测试
- 本地化服务的单元测试
- 用 SharedPref 替换 get_storage(get_storage 未解决的测试问题)
- 重构代码
Quick Start
- 为了使应用程序看起来与您的(xd、figma 等)设计完全相同,需要在 main.dart 中为 flutter_ScreenUtil 设置画板大小
1
2
ScreenUtilInit(
    designSize: const Size(375, 812), // 将其更改为画板尺寸
- FCM 和 Awesome 通知在 main.dart 中初始化,因此当您将应用程序连接到 firebase 时,您的应用程序将准备好接收通知,您不需要执行任何操作,如果您想将令牌发送到 api,您可以在中找到此函数FcmHelper 类
1
2
3
static _sendFcmTokenToServer(){
  var token = MySharedPref.getFcmToken();  // TODO 将 FCM 令牌发送到服务器
}
- 修改 app package
1
flutter pub run change_app_package_name:main com.new.package.name
- 修改 app name
1
flutter pub run rename_app:main all="My App Name"
- 修改 app launch icon (替换app icon assets/images/app_icon.png ) 然后运行命令
1
flutter pub run flutter_launcher_icons:main
- FCM:firebase 最近已将(添加 flutter 应用程序)添加到您的 firebase 中,这将使我们的 flutter(androidios) 应用程序添加到 firebase 只需 2 个步骤
- 首先您需要下载 Firebase CLI 并在终端中执行:
1
dart pub global activate flutterfire_cli
- 然后按照 firebase 指南进行操作,您将得到与此类似的命令
1
flutterfire configure --project=flutter-firebase-YOUR_PROJECT_ID
就是这样!您的项目现已连接到 firebase,并且 fcm 已启动并准备好接收通知
- 首先您需要下载 Firebase CLI 并在终端中执行:
IOS 需要执行更多步骤来接收 fcm 通知,然后遵循 Dcos 步骤,之后一切都应该从 flutter 端正常工作
Architecture
- UI层:
- view:HMI
- UIcomponents:存放UI公共组件和点值。
- values:包含:strings、colors、dimens、arrays、styles等。
- commonwidget:可复用的组件。
- state:维系APP数据
- theme:主题
- translations:多语言
- 数据层:
- repository:数据提供者
- data:本地数据
- hive:本地键值对
- sql:大数据存储
- net:网络客户端
- 对exception,response,进行解耦。
- 对config进行抽取,单独维护。
- error的interceptor的拦截,发现错误提前终止,缩短业务调用链。
- 引入DioLogger对net的log进行单独的输出控制、单独的输出样式。
- 核心层
- BaseController
- 泛型形式规定传入BaseRepository的子类,
- controller生命周期内,通过维护PageState负责处理页面状态转换。
- 维护repository控制数据
- BaseRepository
- DioClient获取网络客户端,提供网络数据获取能力。错误处理,进度回调。以mixin形式混入,
- 充分解耦。
- 维护cancelToken用于取消网络。
- 持有controller实例,回调网络数据状态给controller。
- 根据标记控制数据来源,local,net,mock。
- BaseView
- 泛型形式规定传入BaseController的子类。
- 实现整个页面框架。规范View的切换流程,根据网络请求结果,由BaseController控制,自动控
- 制显示指定页面(loading页,error页,retry页,succeed页)
- 提供共用组件的默认实现。实现公共功能,如展示loading,appbar的基础实现。满足大部分页面需求。
- 根据controller提供的页面状态修改页面。
- 提供替换UI组件的接口,方便子类自定义。如appbar显隐控制,appbar的替换等。支持特殊的页面需求。
- succeed页面以抽象接口形式提供。新增业务页面时,继承BaseView。实现子类自己的succeed页。
- 修改定制内容,实现个性化子页需求。
- BaseController
- 系统服务层
- Bindings:页面配置
- config:系统设置
- service:全局服务
- routers:路由服务
- 工具层
- logger
- hive
- db
- sql
- account
- shared_pref
- permission
- notification
- web_socket
- debouncer
- webview
- 业务层
- view:业务视图
- binding:业务绑定
- controller:业务控制器
- repository:业务数据
- widget:业务特有的小部件
API
module
1
2
3
4
5
6
7
8
9
10
11
12
13
14
15
16
17
18
19
20
21
22
23
24
25
26
27
28
29
30
31
32
33
34
35
36
//1.编写controller继承baseController,实现自己的业务控制。
class Favorite Controller extends BaseController<FavoriteRepository>{
}

//2.编写repository继承BaseRepository,实现自己的数据获取。
class FavoriteRepository extends BaseRepository{
	@override
	loadData()=>showSucceedPage();
}

//3.编写view继承BaseView,实现自己的界面元素。
class FavoriteView extends BaseView<FavoriteController>{
	const FavoriteView({super.key});
	@override
	Widget body(BuildContextcontext){
		return const Center(
			child:Text('FavoriteViewisworking',style:titleStyle),
		);
	}
}

//4.将以上组件组合起来。
class FavoriteBinding extends Bindings{
	@override
	void dependencies(){
		Get.lazyPut<FavoriteController>(()=>FavoriteController());
		Get.lazyPut<FavoriteRepository>(()=>FavoriteRepository());
	}
}

//5.注册进框架
GetPage(
  name: Routes.FAVORITE,
  page: () => const FavoriteView(),
  binding: FavoriteBinding(),
),
net
- 调用 (in Repository)
1
2
3
getData<UserInfoEntity>(url, RequestType.put, fromJsonT: (json) {
  return UserInfoEntity.fromJson(json);
});
- net API
1
2
3
4
5
6
7
8
9
10
11
12
13
14
15
getData<T>(
  String url,
  RequestType requestType, {
  Map<String, dynamic>? headers,
  Map<String, dynamic>? queryParameters,
  NetError? onError,
  NetReceiveProgress? onReceiveProgress,
  NetReceiveProgress? onSendProgress,
  Function? onLoading,
  dynamic data,
  CancelToken? cancelToken,
  required JsonFactory<T> fromJsonT,
}) async {
  ...
}
Snackbars
1
2
3
4
AppSnackBar.showCustomSnackBar(title: 'Done successfully!', message: 'item added to wishlist');
AppSnackBar.showCustomErrorSnackBar(title: 'Failed!', message: 'failed to load data');
AppSnackBar.showCustomToast(message: 'added to card');
AppSnackBar.showCustomErrorToast(message: 'added to card');
 |  |
 |  |
dimension
1
2
3
4
5
6
7
8
9
200.w // adapted to screen width
100.h // /Adapted to screen height
25.sp // adapted font size
10.r // adapted radius
// Example
Container(
	height: 100.h,
	width: 200.w,
	child: Text("Hello",style: TextStyle(fontSize: 20.sp,)))
theme
- 修改主题
1
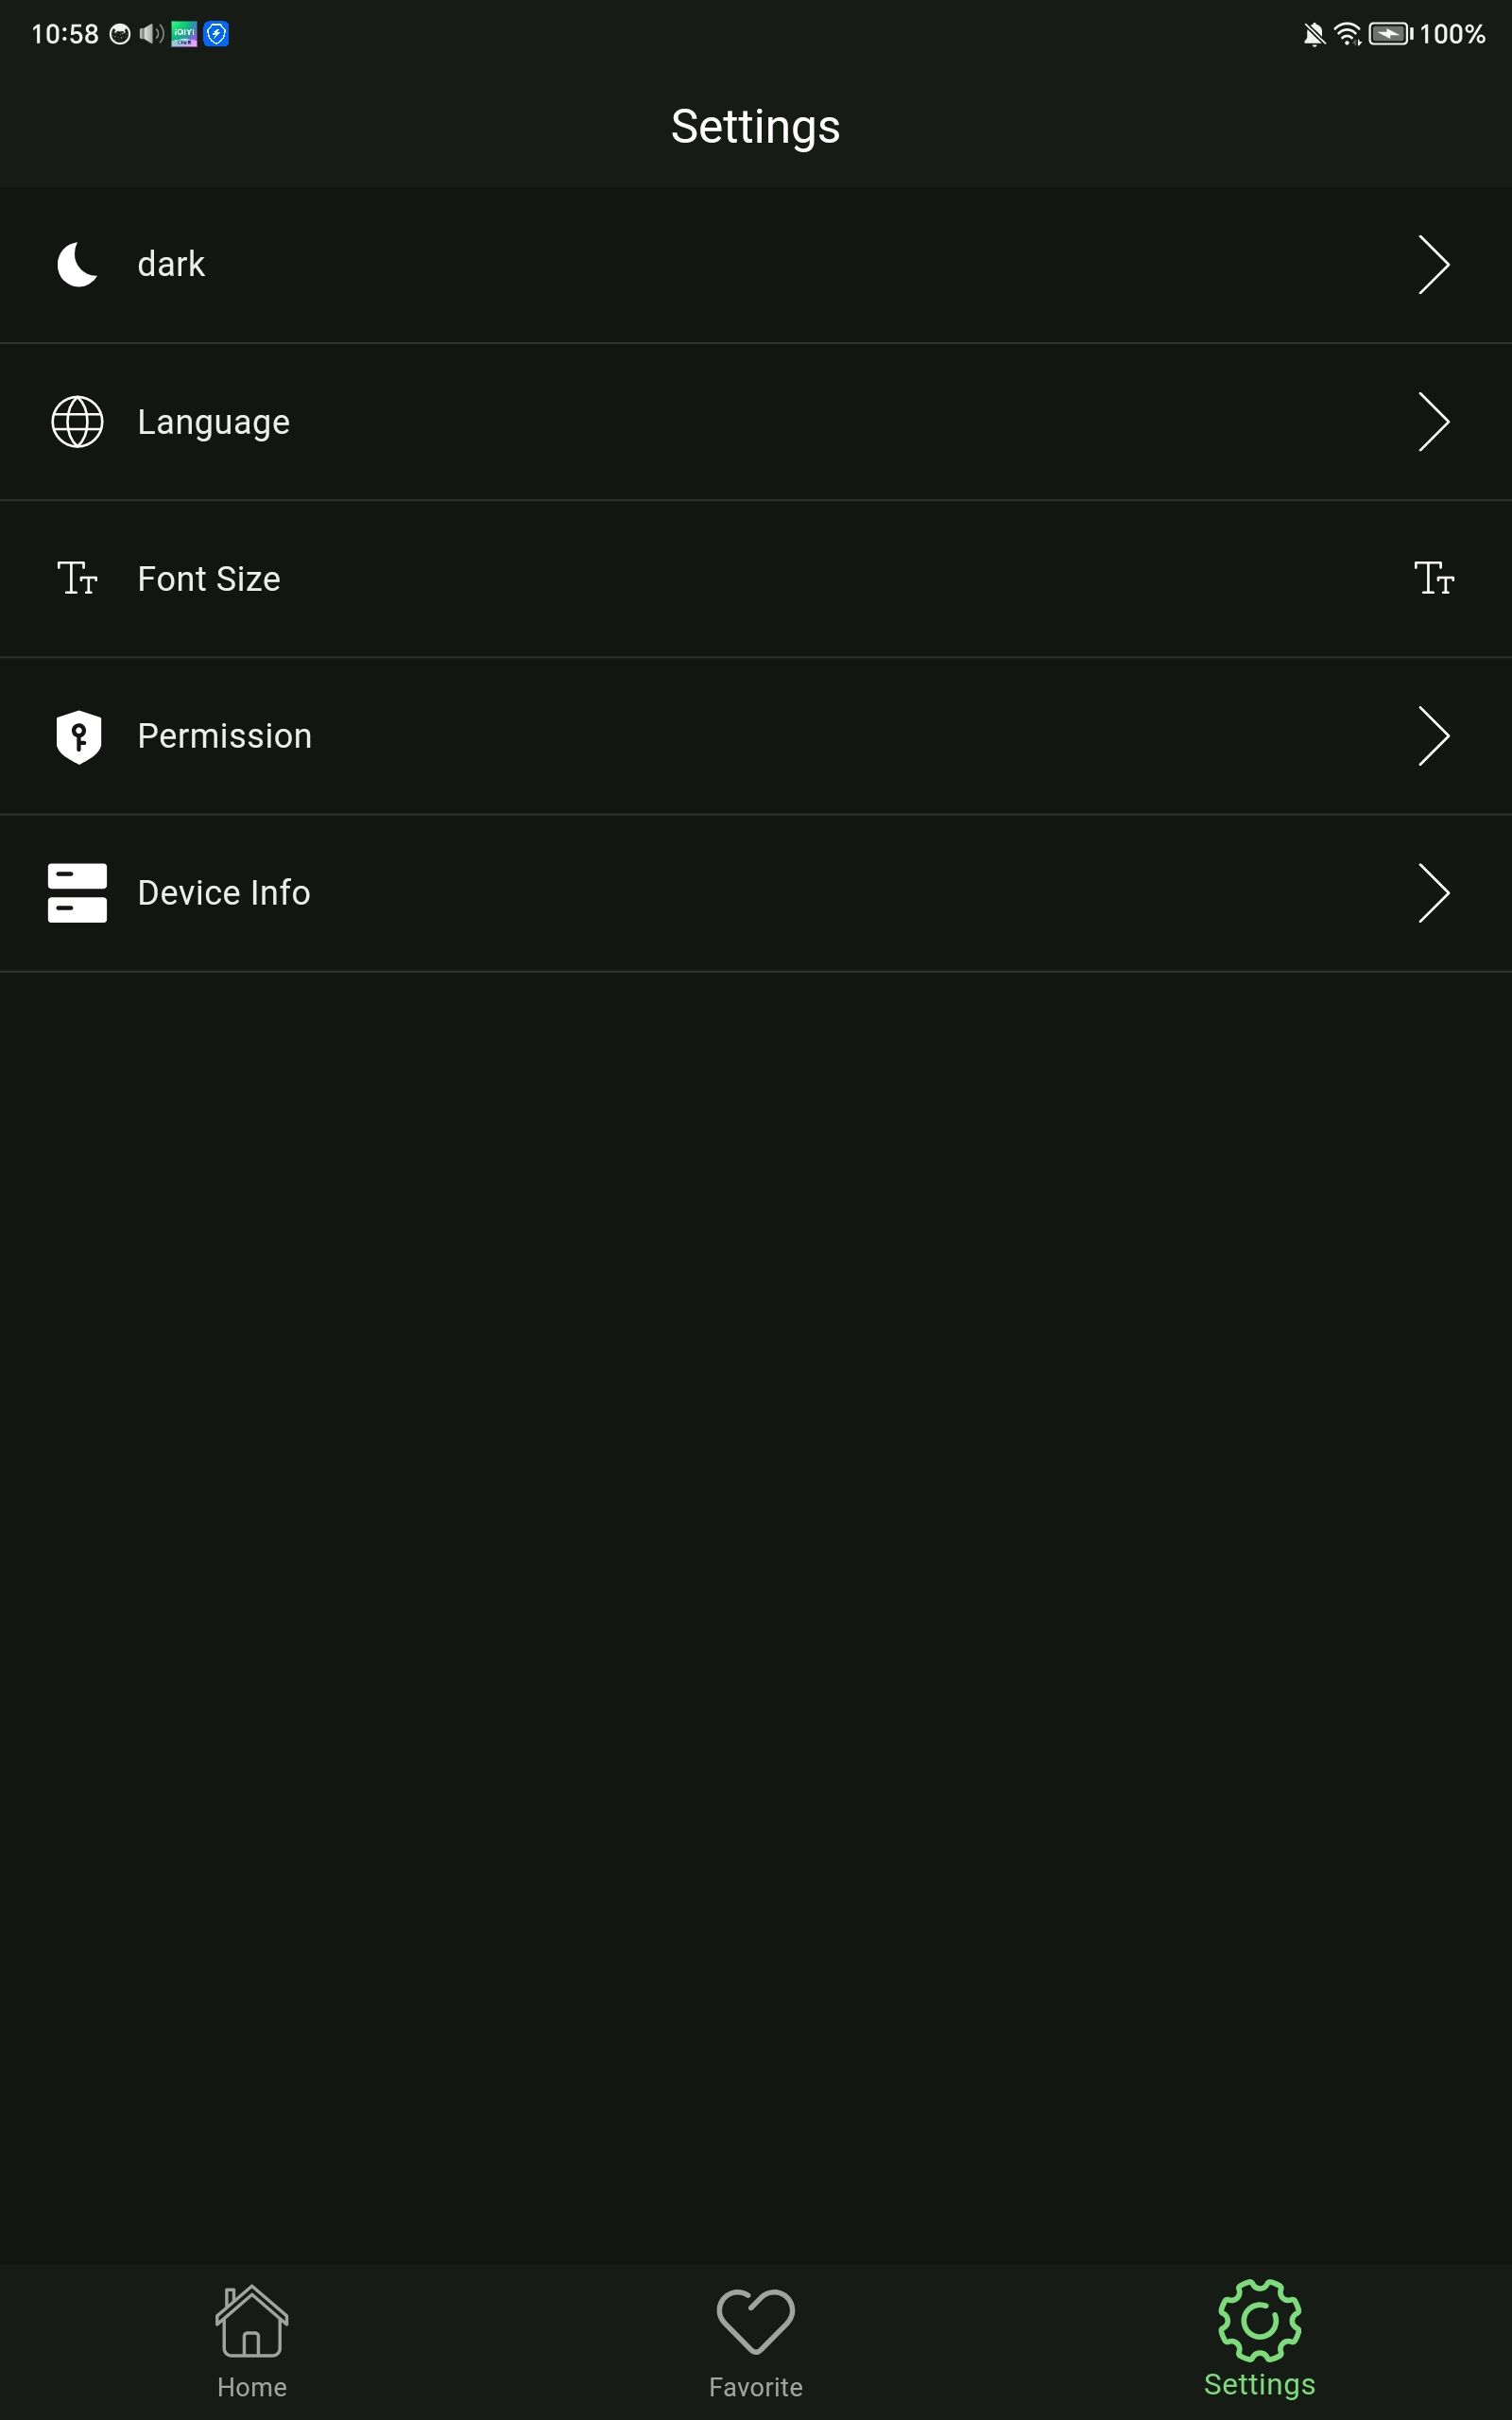
ThemeService().changeTheme(ThemeMode.dark)
- 获取当前ThemeMode
1
ThemeMode currentMode = ThemeService().getCurrentThemeMode();
- 本地记录的是ThemeMode的int值
1
2
3
4
5
6
7
  bool isLightTheme() => ThemeMode.light == ThemeMode.values[AppPreference.getInt(themeValue)];

  bool isDarkTheme() => ThemeMode.dark == ThemeMode.values[AppPreference.getInt(themeValue)];

  bool isFollowSystem() => ThemeMode.system == ThemeMode.values[AppPreference.getInt(themeValue)];

  ThemeMode getCurrentThemeMode() => ThemeMode.values[AppPreference.getInt(themeValue)];
- 主题可以使theme包下的自定义主题。
- 如果你想使用成套的主题 FlexThemeData使用非常的方便,在GetMaterialApp引用FlexThemeData.light();
1
2
3
4
5
6
7
8
9
10
11
12
13
14
15
16
17
18
19
20
21
22
23
24
25
26
27
28
29
30
31
32
33
34
35
36
37
38
39
40
41
42
GetMaterialApp(
  ...
  theme: FlexThemeData.light(
    scheme: FlexScheme.greyLaw,
    surfaceMode: FlexSurfaceMode.levelSurfacesLowScaffold,
    blendLevel: 7,
    subThemesData: const FlexSubThemesData(
      blendOnLevel: 10,
      blendOnColors: false,
      useTextTheme: true,
      useM2StyleDividerInM3: true,
      alignedDropdown: true,
      useInputDecoratorThemeInDialogs: true,
      bottomNavigationBarSelectedLabelSchemeColor: SchemeColor.onSurface,
      bottomNavigationBarSelectedIconSchemeColor: SchemeColor.onSurface,
    ),
    visualDensity: FlexColorScheme.comfortablePlatformDensity,
    useMaterial3: true,
    swapLegacyOnMaterial3: true,
    splashFactory: InkSplash.splashFactory,
    // To use the Playground font, add GoogleFonts package and uncomment
    // fontFamily: GoogleFonts.notoSans().fontFamily,),
  darkTheme: FlexThemeData.dark(
    scheme: FlexScheme.greenM3,
    surfaceMode: FlexSurfaceMode.levelSurfacesLowScaffold,
    blendLevel: 13,
    subThemesData: const FlexSubThemesData(
      blendOnLevel: 20,
      useTextTheme: true,
      useM2StyleDividerInM3: true,
      alignedDropdown: true,
      useInputDecoratorThemeInDialogs: true,
    ),
    visualDensity: FlexColorScheme.comfortablePlatformDensity,
    useMaterial3: true,
    swapLegacyOnMaterial3: true,
    splashFactory: InkSplash.splashFactory,
    // To use the Playground font, add GoogleFonts package and uncomment
    // fontFamily: GoogleFonts.notoSans().fontFamily,),
  themeMode: ThemeService().getCurrentThemeMode(),
  ...
  )
 |  |
i18n
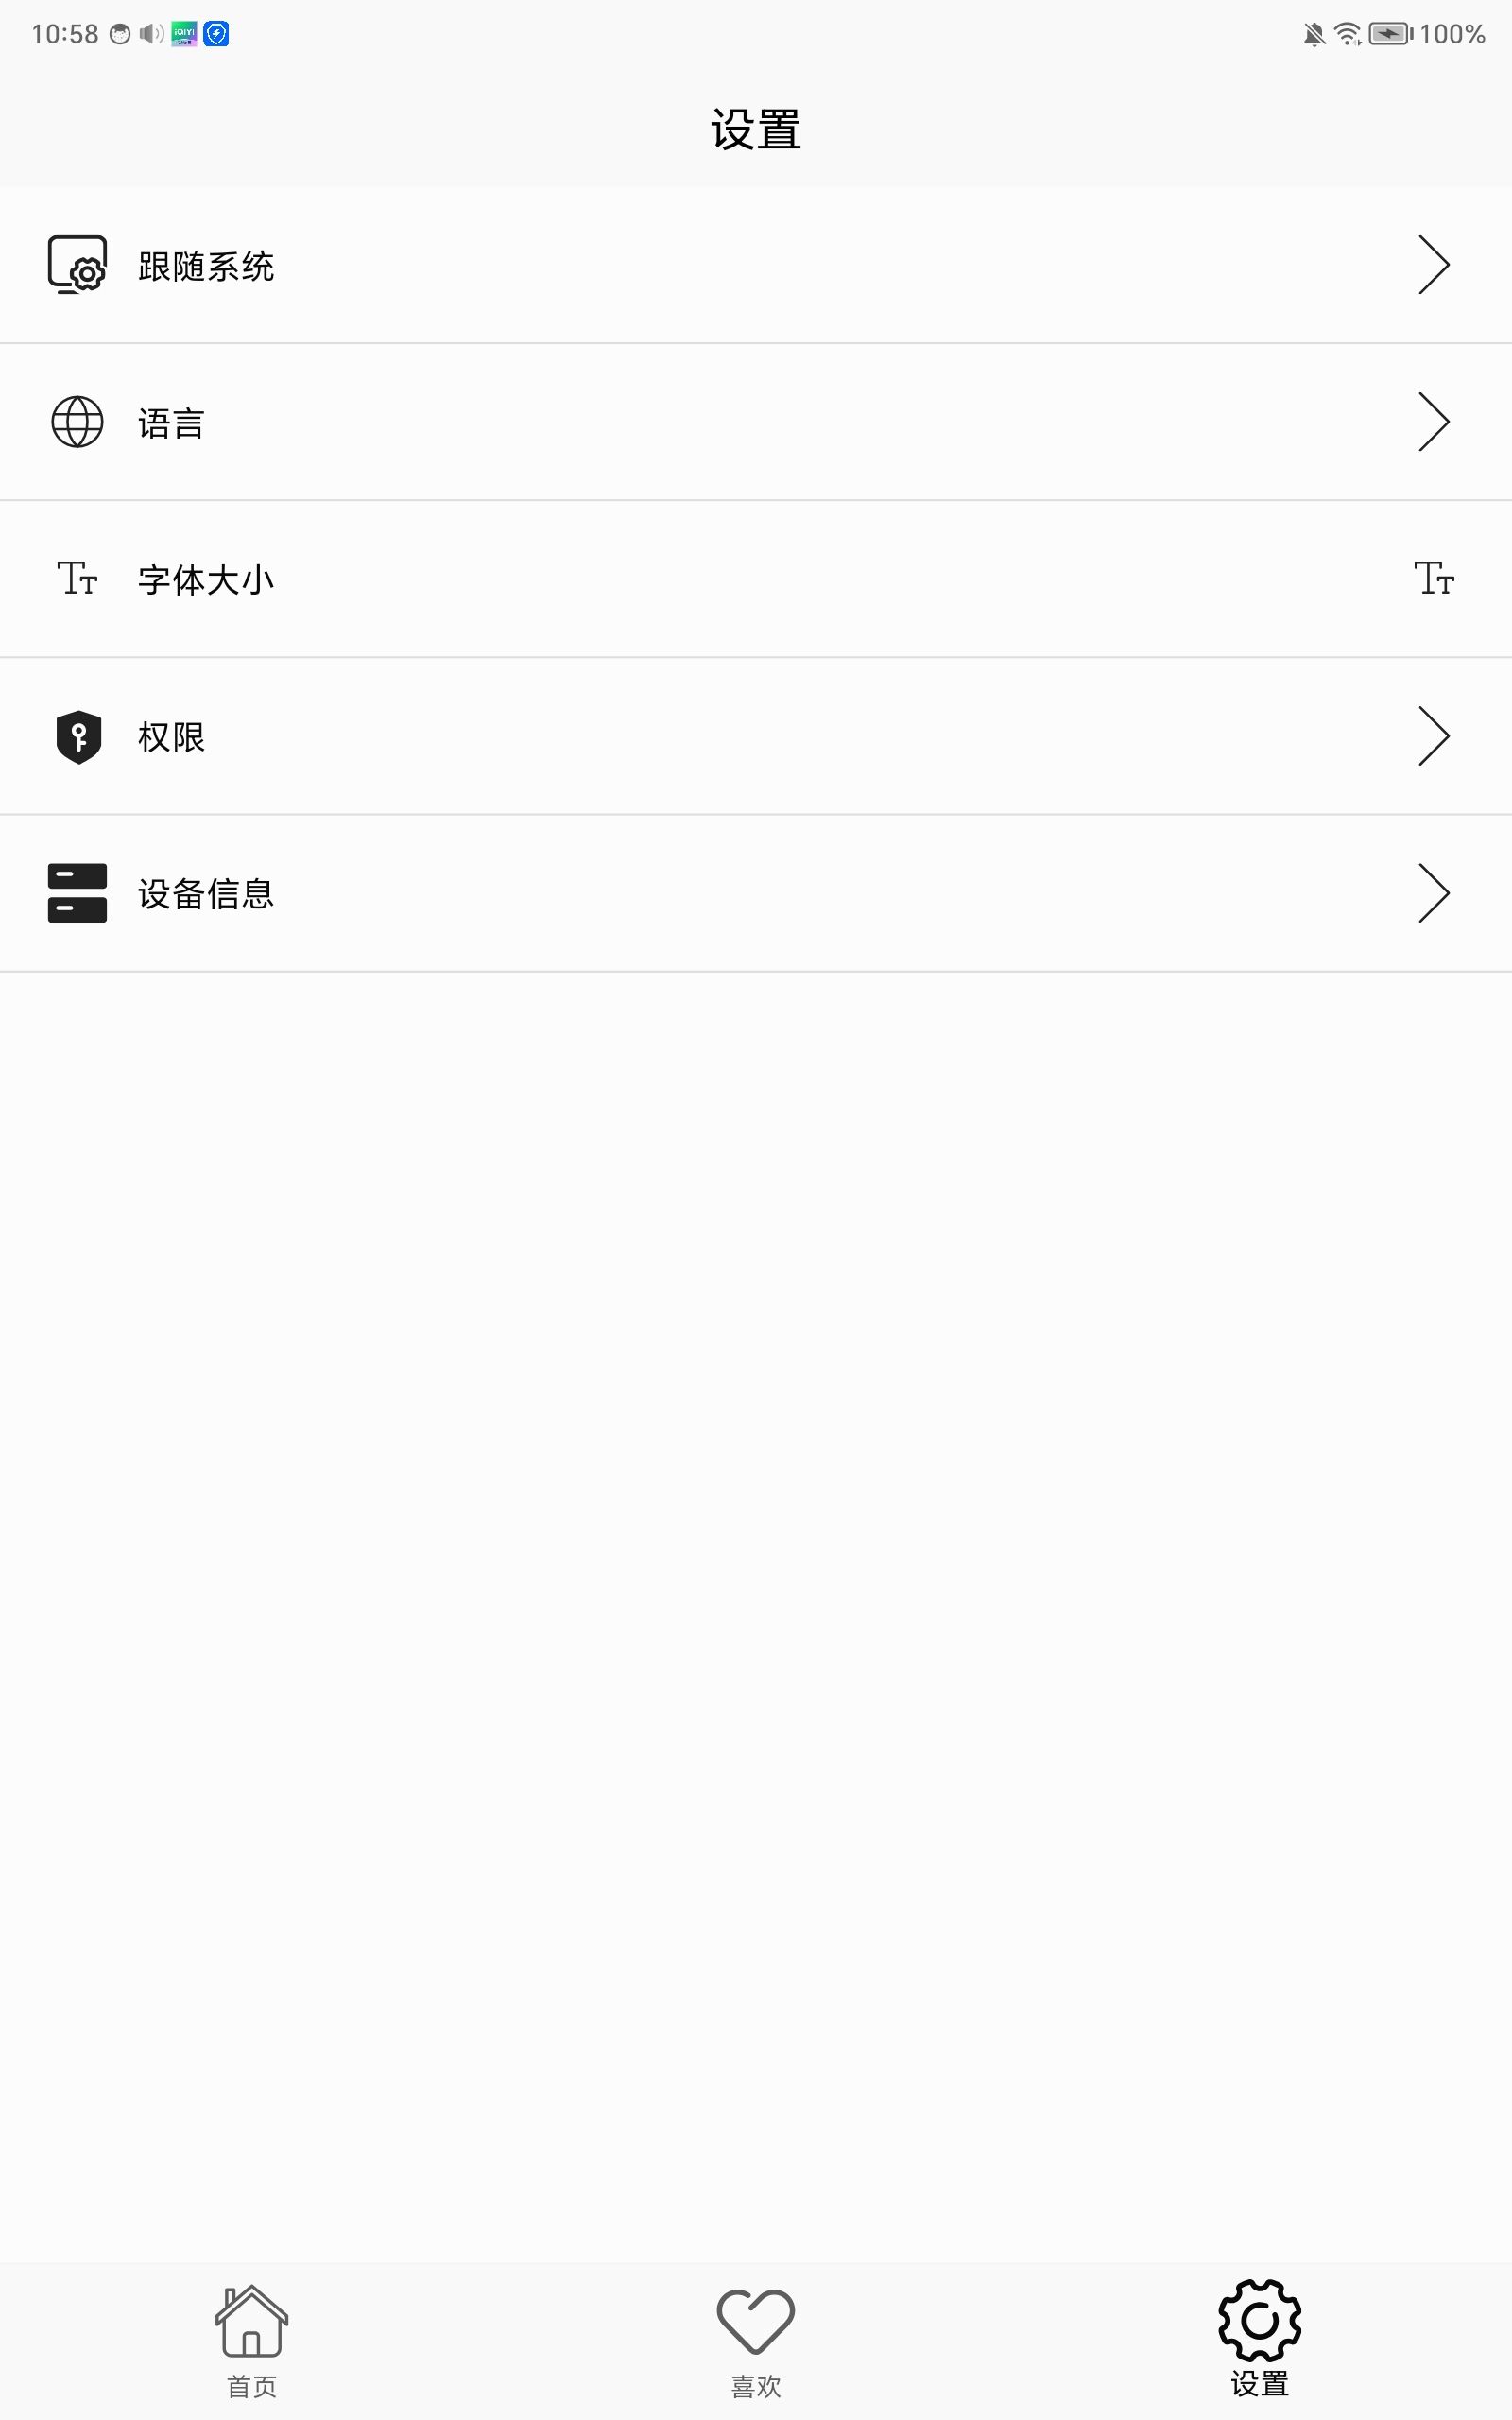
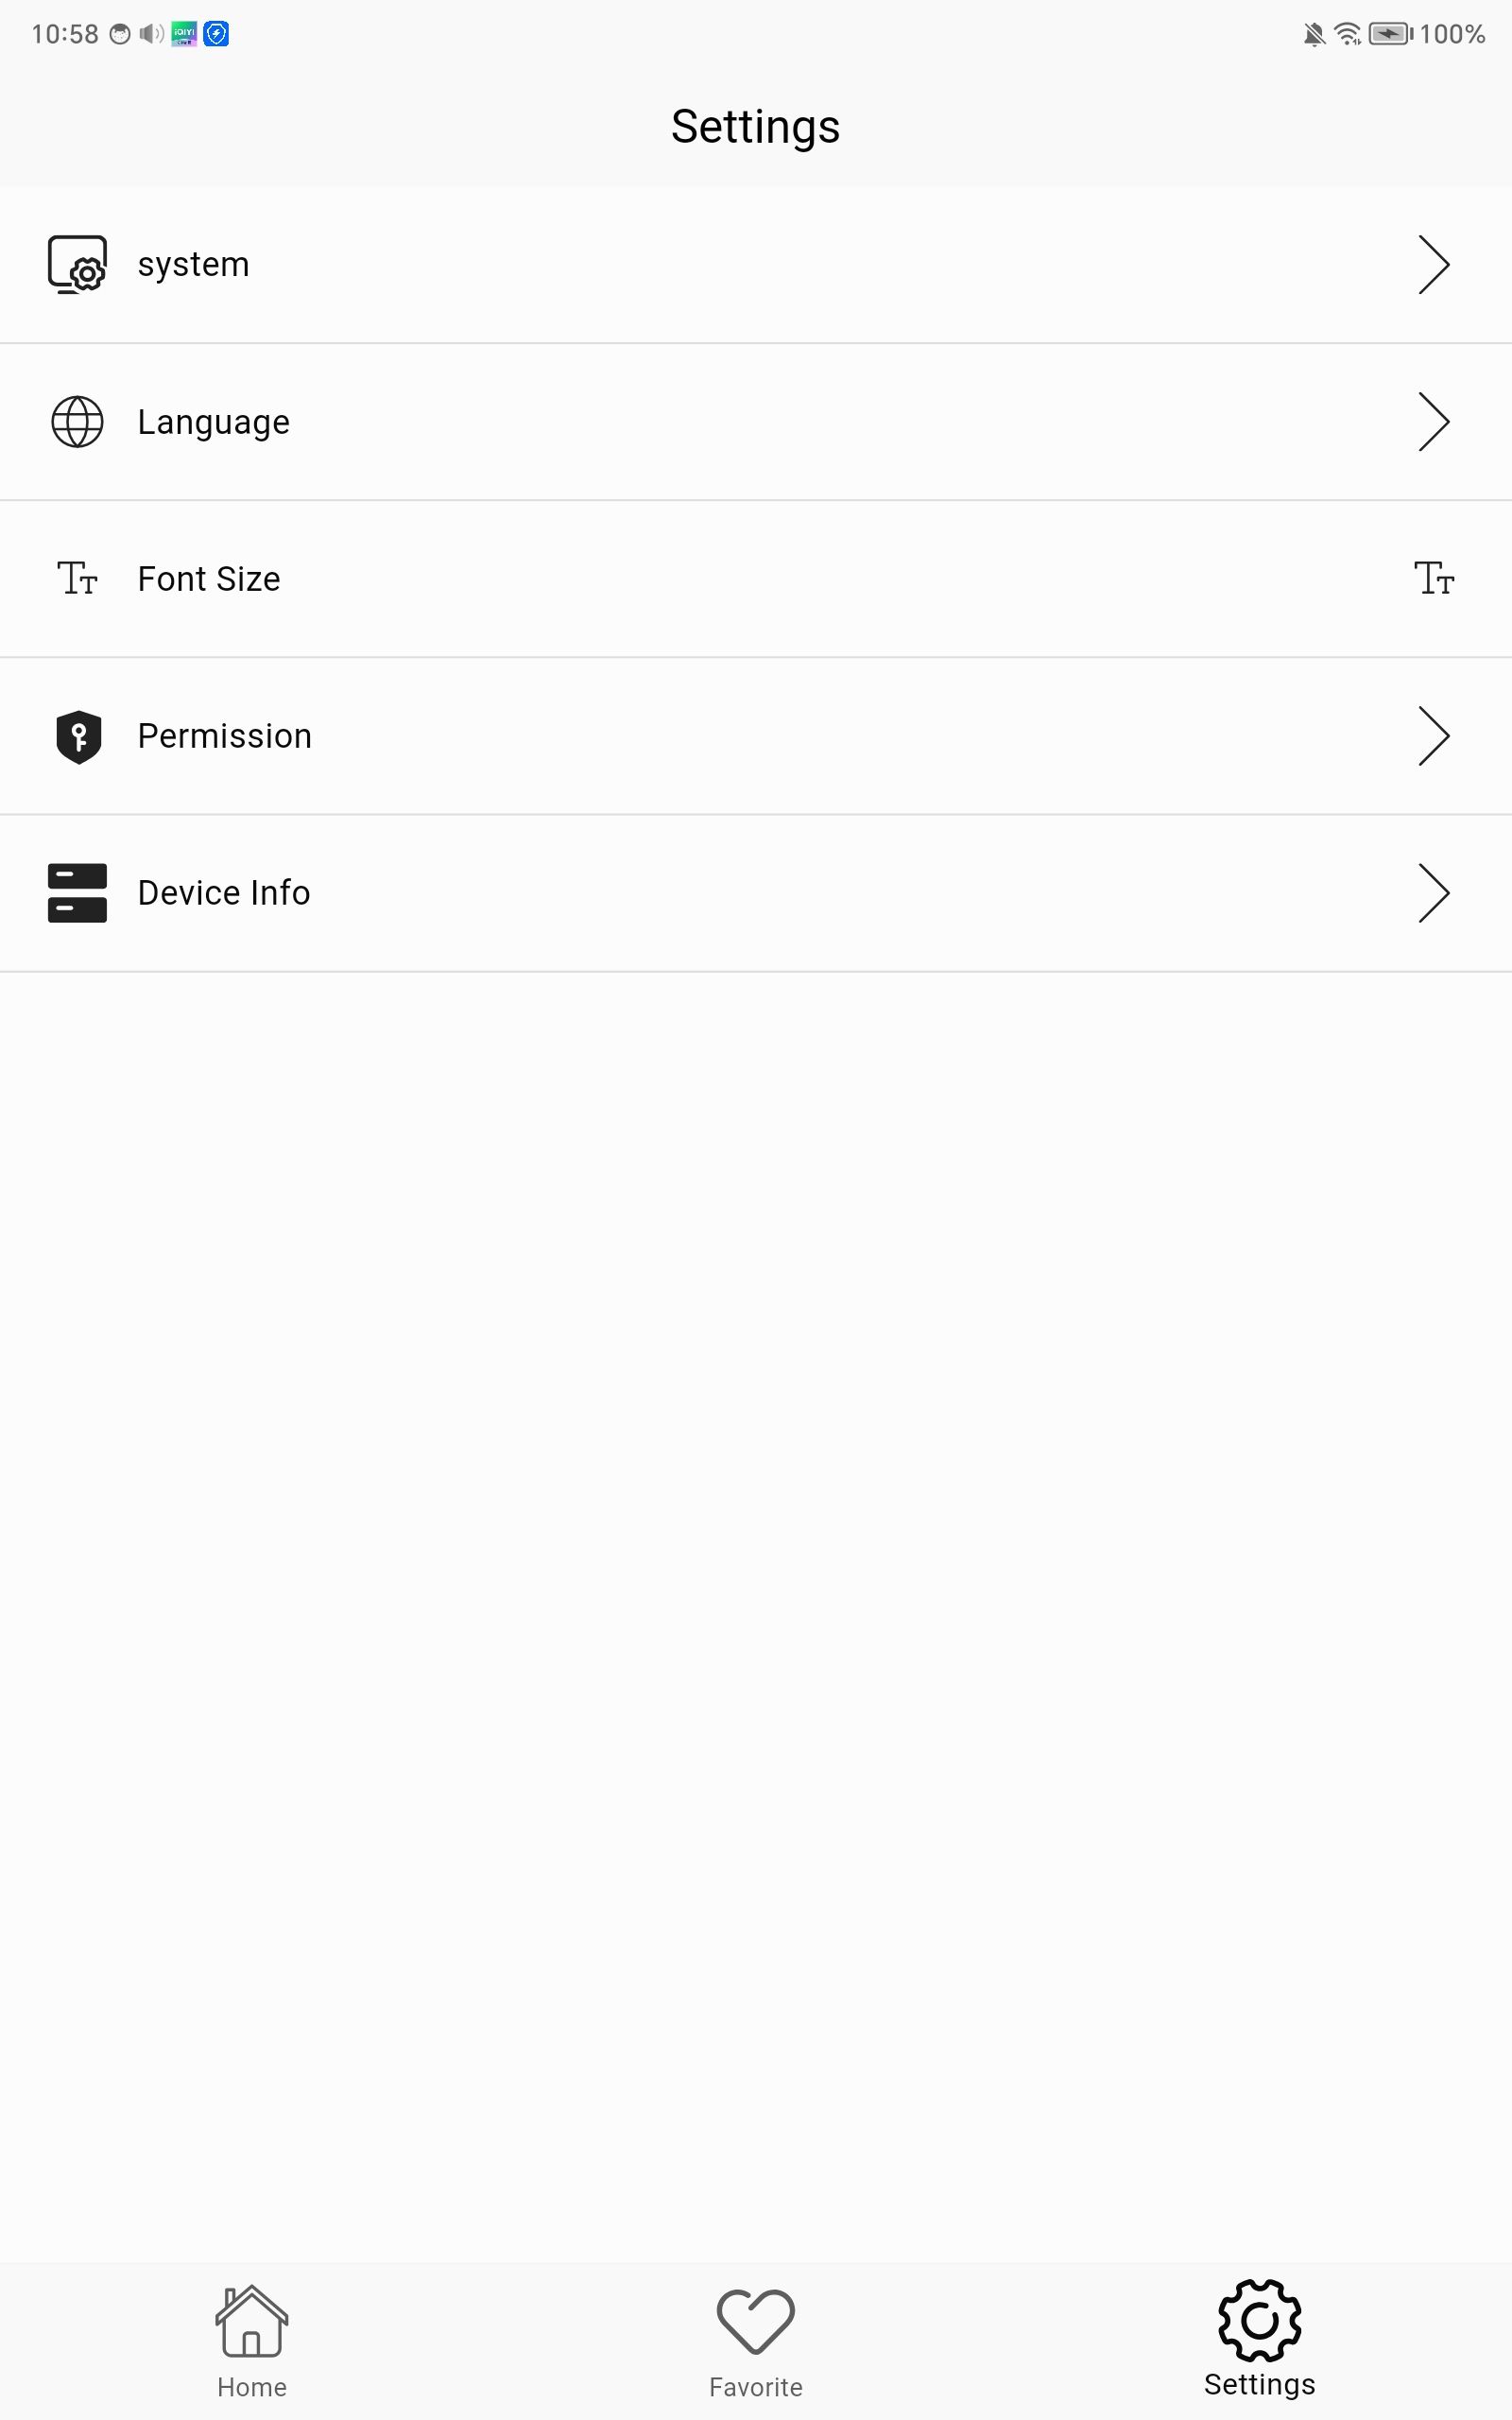
- 修改app语言
1
LocalizationService().updateLanguage('zh');
- 获取当前语言
1
LocalizationService().getCurrentLocal();
- 使用多语言
1
Text(Strings.hello.tr)
 |  |
Discovering Project
After setting up all the needed thing now lets talk about folder structure which is mainly based on Getx Pattern and there are some personal opinions, if you open your lib folder you will find those folders
1
2
3
4
5
6
7
8
9
10
11
12
13
14
15
16
17
18
19
20
21
22
23
 .
└── lib
	├── config
	├── core
	├── data
	│   ├── local
	│   │     └── hive
	│   └── net
	├── generated
	│   ├── json
	│   └── assets.dart
	├── modules
	│   └── home
	├── net
	│   ├── interceptor
	│   └── mixin
	├── routes
	├── theme
	├── translations
	├── utils
	├── values
	├── widget
	└── main.dart
Thanks To Contributors 🧡
Thanks to all the amazing contributors who have helped improve this project!
Support
For support, email wrd20150101@gmail.com
Thanks
Project was created using
get_cli which is a great tool helping you to (start project,create screens/controllers, handling DI)..etc and we will list other packages that helped to create this skeleton
GetX for state management,navigation,managing dependencies..etc
flutter_screenutil to make app more responsive
hive as local database
shared_preferences store data persistently as key/value
awesome_notifications for local notification